
Step-by-step guide for client admins, client users and executive viewers
Before you start
- Who can do it. Everyone, for their own account. Settings are yours: no one else can change them for you here. Your organisation's own notification delivery is set in the Organisation workspace.
- Where it is. Settings is in the account menu at the top right of every page, not in the left menu.
Steps
-
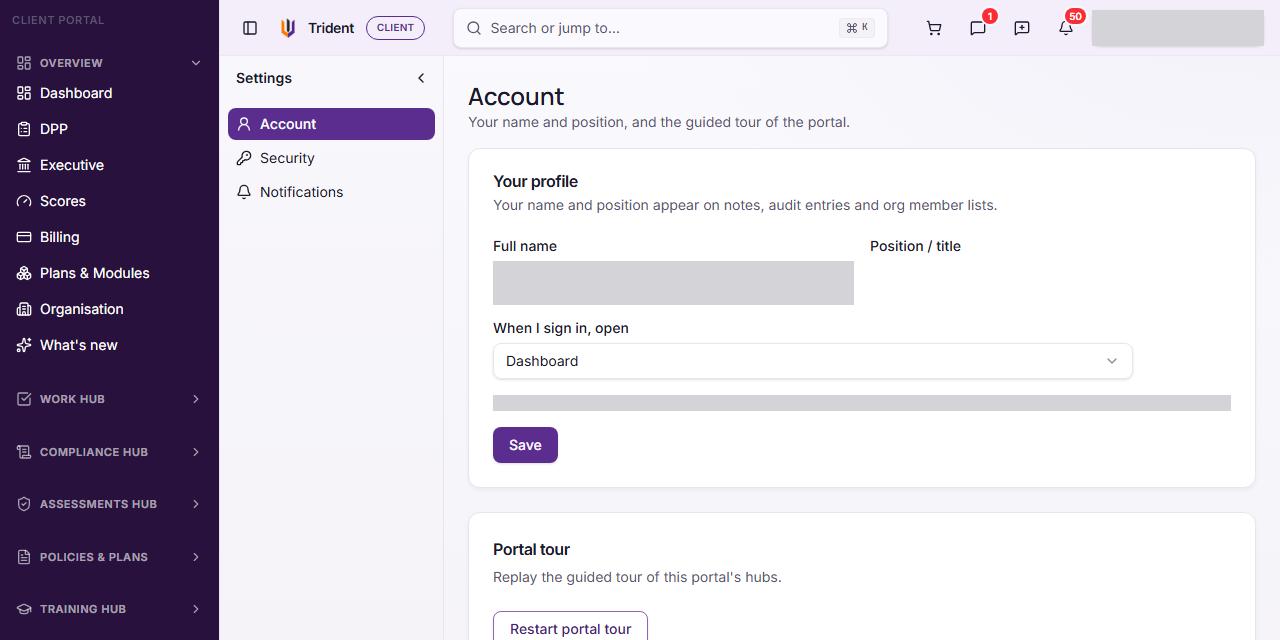
Open Settings. Select your account menu at the top right, then Settings. The page has three sections: Account, Security and Notifications.
-
Update your profile. In Account, under Your profile, change your Full name and Position / title, then select Save. They show on notes, audit entries and member lists. Your email is shown and cannot be changed here.
-
Choose where you land. If your organisation has the Executive workspace switched on, a When I sign in, open choice lets you start on the Dashboard or the Executive workspace. It saves when you choose.
-
Replay the tour. Restart portal tour replays the guided tour of the portal's hubs. It changes nothing else.
-
Set a password. In Security, enter a New password of at least eight characters, enter it again under Confirm password, and select Save password.
-
Choose your notifications. In Notifications, under Channels, each type of notification has a switch for In-app and one for Email. Each switch saves as soon as you change it.
Check it worked
- A message confirms each save.
- Your name and position show on the next note you write.
- A changed notification switch stays as you set it when you come back.
If something goes wrong
- A message says the passwords do not match, or are too short. Enter the same password twice, with at least eight characters.
- The landing choice is missing. The Executive workspace is not switched on for your organisation.
Last checked against Trident on 2026-11-06.